How to Create a RAID volume on my EON
Currently, as of Jan 2022, openmediavault doesn’t support the creation of the RAID via USB, so you need to use terminal commands:
A great link with all information can be found here.
Build a Raspberry Pi RAID NAS Server - [UPDATED 2020] - Ricmedia
-
Connect to your EON / Raspberry Pi via your preferred SSH or locally with a keyboard and monitor.
-
Login to your devices and be sure to be as Root. As you are using root commands, it’s easier to be a root user to start with.
sudo -i
- Update your system and install mdam to the latest build.
sudo apt-get update sudo apt-get upgrade -y sudo apt-get install mdadm -y
- Now you can check what devices are detected on the USB using the blkid command
blkid
- The first two entries below are the MicroSD Card system volumes (example only).
/dev/mmcblk0p1: LABEL_FATBOOT=“boot” LABEL=“boot” UUID=“E183-6233” BLOCK_SIZE=“512” TYPE=“vfat” PARTUUID=“f1b709c5-01” /dev/mmcblk0p2: LABEL=“rootfs” UUID=“1232a209-2596-48f0-a078-731d10b918ad” BLOCK_SIZE=“4096” TYPE=“ext4” PARTUUID=“f1b709c5-02” /dev/sda: UUID=“9a87989d-4416-418c-a4e1-519f7eee35ec” UUID_SUB=“bd60ae45-dc12-abb8-c9fa-86bc81889694” LABEL=“raspberrypi:vol1” TYPE=“linux_raid_member”
/dev/sdd: UUID=“9a87989d-4416-418c-a4e1-519f7eee35ec” UUID_SUB=“cfa06626-2185-0f75-ee37-0e6f530e89a5” LABEL=“raspberrypi:vol1” TYPE=“linux_raid_member”
/dev/sdb: UUID=“689ce03f-1702-4659-2a84-44945406b248” UUID_SUB=“a86057f4-f98a-2a07-c62b-38402b09af89” LABEL=“raspberrypi:vol2” TYPE=“linux_raid_member”
/dev/sdc: UUID=“689ce03f-1702-4659-2a84-44945406b248” UUID_SUB=“09d326e7-02fd-9e0b-2541-080064541fb5” LABEL=“raspberrypi:vol2” TYPE=“linux_raid_member”
(Note: if you are booting your RPI via the internal USB header, the results may differ slightly from the above)
- The EON has four connectors for HDDs, they should report to the system as /dev/sda, /dev/sdb, /dev/sdc & /dev/sdd So, this means /dev/sda /dev/sdd are the 3.5in HDD slots, and /dev/sdb & /dev/sdc are the 2.5in HDD slots.
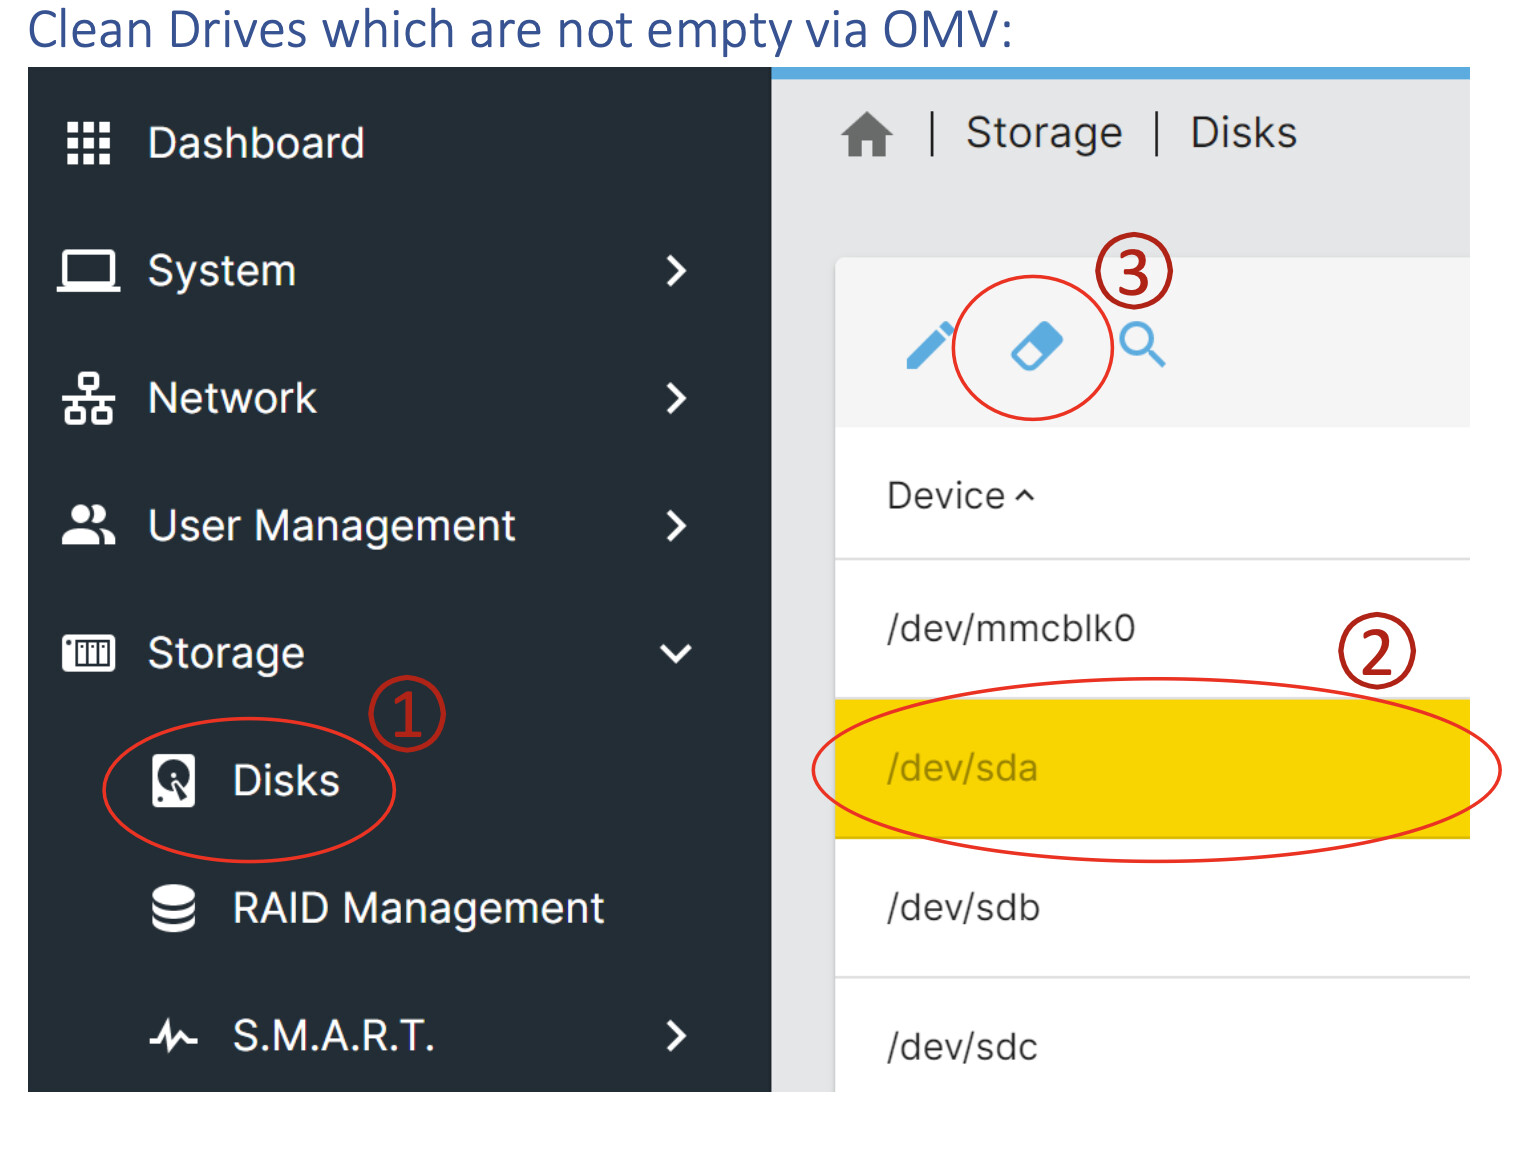
Note: if you have no UUID or have some volumes present, it’s best to wipe the disk before trying to build an array.
- Created a mirror for both sets of drives, and used the following commands.
mdadm --create --verbose /dev/md/vol1 --level=1 --raid-devices=2 /dev/sda /dev/sdd mdadm --create --verbose /dev/md/vol2 --level=1 --raid-devices=2 /dev/sdb /dev/sdc
Note: You will be prompted for some confirmation prompts and even notice if the drives have existing data on them, then you need to clean the drives (see below)
mdadm: partition table exists on /dev/sdb
mdadm: partition table exists on /dev/sdb but will be lost or
meaningless after creating array
mdadm: Note: this array has metadata at the start and
may not be suitable as a boot device. If you plan to store ‘/boot’ on this device please ensure that
your boot-loader understands md/v1.x metadata, or use --metadata=0.90
mdadm: partition table exists on /dev/sdc
mdadm: partition table exists on /dev/sdc but will be lost or
meaningless after creating array mdadm: size set to 976630464K
mdadm: automatically enabling write-intent bitmap on large array
As soon as you create these, OpenVault media will pick up the volumes
Continue creating array? Y (you will be prompted here to accept the creation) mdadm: Defaulting to version 1.2 metadata
mdadm: array /dev/md/vol2 started.
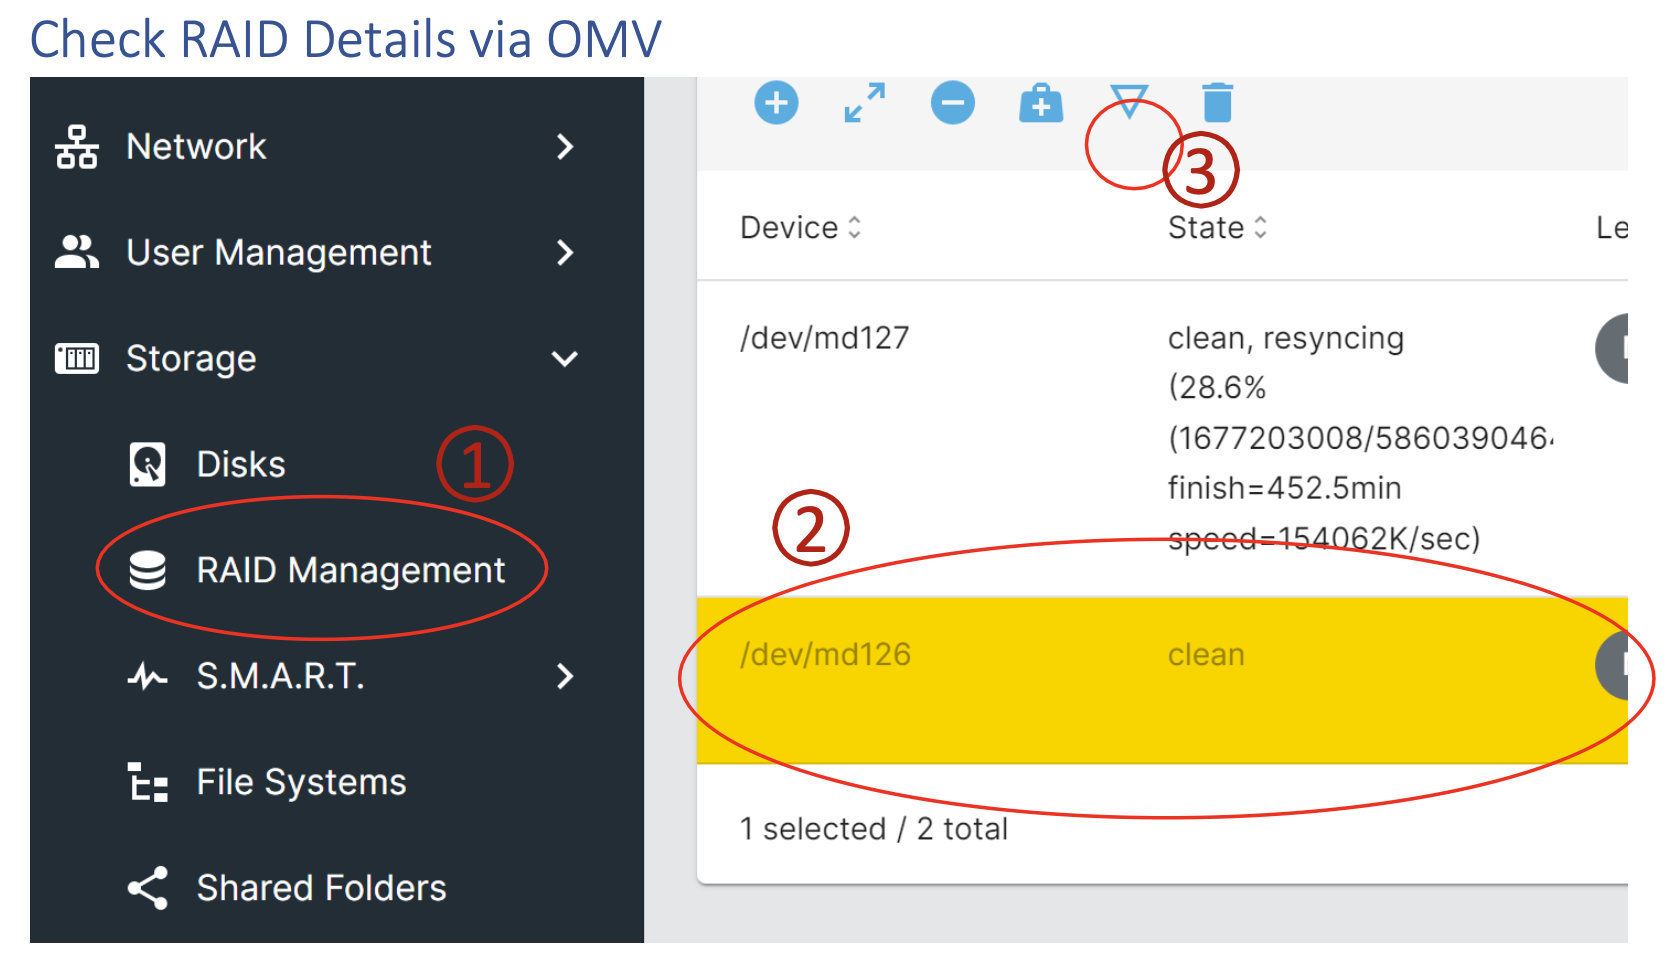
Check RAID Details via OMV
Clean Drives which are not empty via OMV: