Hello everyone,
Not sure how to go about this forum but since i bought the Neo 5 nvme and i ended up here i thought i might make a post with what i wanted to do , what steps i took and how it worked for me, just in case someone else finds this helpful.
Hardware (initial)
Pi 5 8gb RAM
Original pi 5 case (the red/white one)
Original default pi 5 power supply
SD card 128gb Samsung evo plus
Hardware (upgrade)
Argon Neo 5 nvme
Kingston NV2 SSD 1TB M.2 NVMe
So i have this setup with Debian bookworm about 5-6 months now, without any UI.
I am not an expert on Linux besides basic concepts but i do search a lot to get the job done.
That being said, i was bored to do the upgrade and do all the setup from the beginning.
Steps i took :
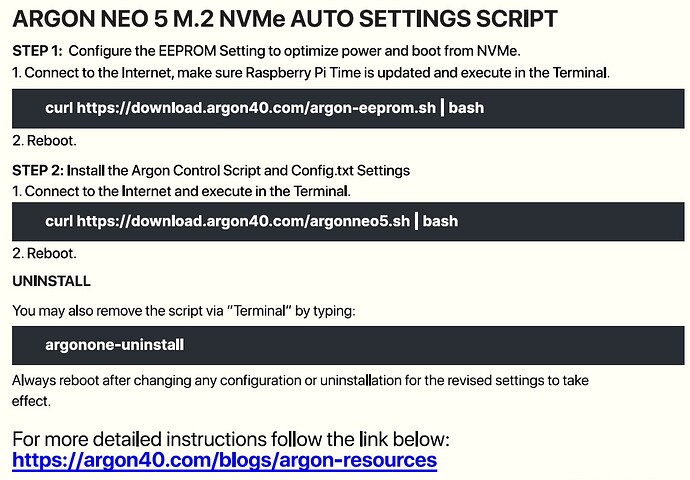
- On my pi with the SD on, i ssh’d and run the scripts from argon40
(probably need to sudo this too to make sure)
-
Got an external m.2 case to usb that supports nvme drives (mine is Ugreen CM400 which works really well). Inserted my Kingston drive and then into a usb port on my windows pc.
-
After you are done with step 1 and maybe also make one last full update/upgrade to your system.
Shut down the pi and take out the SD card -
If your pc or laptop does not have an SD slot and i would susgest a usb adapter. Put the SD in and also connect it to your pc.
-
Download Rufus. When in the device you select(if not already pre-selected) the SD card click the save icon on the right and choose a place to save the SD as an image.
Note that since this clones the disk as an image file it will take the SD space on your local drive which means my SD is 128gb it does not matter if my linux installation is 5mb or 5gb…this will be approximately 128gb file. -
When this is done (it will take some time) close Rufus, get the SD/USB out of your pc and run Rufus again. Now with the Kingston drive connected and selected select the image of the SD and start flashing it onto the SSD drive.(this will also take a while)
-
Do all that you need to do to get the Pi out of the old case and put it in the new Argon . Also the SSD. I took the risk of not putting the SD card again back in but i was lucky and everything worked so i did not have to disassemble everything back again.
-
Power up the pi once its done. Find the probably new ip from your router or other application and SSH back into the pie.
-
Now if you run relevant commands you ll see that this way not all the disks space is used. So i will go and paste what worked for me through help from chatGPT. I had to try out several questions because at first it recommended tools and commands that would delete and rebuild the main partition which was not the best choice for me obiously. So i found the safest solution using parted.
You're right to be cautious—deleting the partition that contains your operating system can indeed prevent your system from booting. Let's adjust the approach to safely resize the partition without disrupting the OS.

**Safe Steps to Resize the Partition**

1. **Use parted Instead of fdisk:**

parted allows resizing a partition without deleting it, which is safer for your use case.

Start parted with:

bash

Copy code

sudo parted /dev/nvme0n1

2. **View the Current Partition Table:**

In parted, list the partitions with:

bash

Copy code

(parted) print

This will show you the partitions and their sizes.

3. **Resize the Partition:**

  * Identify the partition you want to resize (likely nvme0n1p2 if it's the second partition).
  * Resize the partition using:

bash

Copy code

(parted) resizepart NUMBER END

Replace NUMBER with the partition number (e.g., 2 for nvme0n1p2), and END with 100% to expand it to the full available space.

4. **Exit parted:**

Once you've resized the partition, type:

bash

Copy code

(parted) quit

5. **Resize the Filesystem:**

Now, resize the filesystem within the resized partition:

bash

Copy code

sudo resize2fs /dev/nvme0n1p2

Replace /dev/nvme0n1p2 with the correct partition identifier.

6. **Verify the Changes:**

Check the updated disk space with:

bash

Copy code

df -h

This method allows you to resize the partition without deleting it, ensuring your OS remains intact and operational.
- After this you will see that all available space of the new drive is now used.
I hope this helps.
In case Admin needs to make corrections or delete this post in case of any violation am not aware please do so and pm me so i know too ![]()
Thanks
