My Argon ONE UP setup (Raspberry Pi OS + KDE & MX Linux tools)

Hi ONE UP community!

I am in South Africa and recently received my ONE UP Laptop from Argon Forty. I was impressed with the shipping (tough to get it right in South Africa – thanks DHL Express and RAM Hand-to-Hand Couriers). Another thing that I liked was the sturdy packaging!

My first impressions of the hardware itself was also very positive. My first shock was how quickly it booted up to the Raspberry Pi OS’s desktop. A saw someone on Kickstarter complaining about the touchpad, but my unit’s works perfectly.

Below is a guide describing how I setup my system, in case it helps other ONE UP community members.

Hardware list

  • Argon ONE UP Laptop (Shell Unit)

  • Argon ONE UP 40-PIN GPIO Module

  • Raspberry Pi Compute Module 5, Wireless, 8GB RAM, Lite - CM510800

  • Argon DATATERM 256 Gig M.2 NVMe Drive

KDE Desktop installation

My laptop came with Raspberry Pi OS already installed on the NVME. I have nothing against the default desktop environment PIXEL (Pi Improved Xwindows Environment, Lightweight) - but I really prefer KDE Plasma. So, without removing PIXEL, I just typed the following into a terminal …

sudo apt update && sudo apt full-upgrade -y

sudo apt install kde-plasma-desktop

When the installation asks about sddm vs lightdm … choose sddm.

MX Linux tools installation

I love MX Linux and I recently discovered that most of MX’s tools are available for the Raspberry Pi … but before any of the tools can be installed the keyring must be installed first.

https://mxrepo.com/mx/repo/pool/main/m/mx25-archive-keyring/mx25-archive-keyring_2025.03_all.deb

I installed this .deb file with Discover, but you can use any method. Then create the mx.list file in /etc/apt/sources.list.d with the following command

echo -e "# MX Community Main Repos\ndeb [arch=arm64] http://mxrepo.com/mx/repo/ trixie main non-free" | sudo tee /etc/apt/sources.list.d/mx.list

Run again …

sudo apt update

Now you can install various MX Linux tools, for example:

sudo apt install mx-tools
sudo apt install mx-conky
sudo apt install job-scheduler
sudo apt install mx-network-assistant
sudo apt install mx-repo-manager
sudo apt install mx-samba-config
sudo apt install mx-service-manager
5 Likes

This install looks very clean. I have a couple of questions for you.

  1. Since you installed the argon script, has the battery percentage displayed change for you? For some reason, for mine, the battery percentage does not change unless I log out or reboot my computer

  2. Does the power percentage button work for you since you installed the argon script?

  3. Since you have samba config for mx tools, how long are your boot times, since for me, nmdb usually takes about 1 minute 30 seconds to initialize during boot.

1 Like

Thanks for your reply and kind words. I did not install the argon script myself, it came pre-installed. The battery percentage displayed does indeed change in real time. Boot time 26 seconds from power button pressed to sddm greeter login prompt!

Thanks for the reply. For the argon script, the battery percentage displayed on the icon seems to lag behind the actual battery percentage displayed when running the argon-config command. Ended up using the battery script from Jeff Curless (GitHub - JeffCurless/argon-oneup: Supporting the One UP from Argon40). For the startup boot time, ended up disabling nmdb to lower the boot time, but that also makes it difficult for me to use samba for file share. Will look into it a bit more to see if there is a way to reduce the boot time when nmdb is enabled for this system.

2 Likes

I had a struggle to get rid of MegaSync auto-starting! Disabled it in the app itself, but it kept on starting! MX Service Manager came to the rescue …

Another linux tool I use often, is Webmin (https://webmin.com/) … brilliant for remote administration of all linux systems!

1 Like

Battery meter not reporting percentage correctly … what can I do to fix this situation?

Is that conky on the right? Ditch the battery meter :grinning_face:

My conky text is

${alignc}${exec /home/csn/bin/battery.sh}

and

$ cat bin/battery.sh
#!/bin/sh

cstat=$(printf “%d” “$(i2cget -y 1 0x64 0x0e)”)

printf "Battery: %d%% " $(i2cget -y 1 0x64 0x04)

if [ $cstat -lt 128 ]; then echo “↗”; else echo “↘”; fi

(note I don’t have bash. And where do you you grow your melons? TJ & ND history many years ago for me.)

1 Like

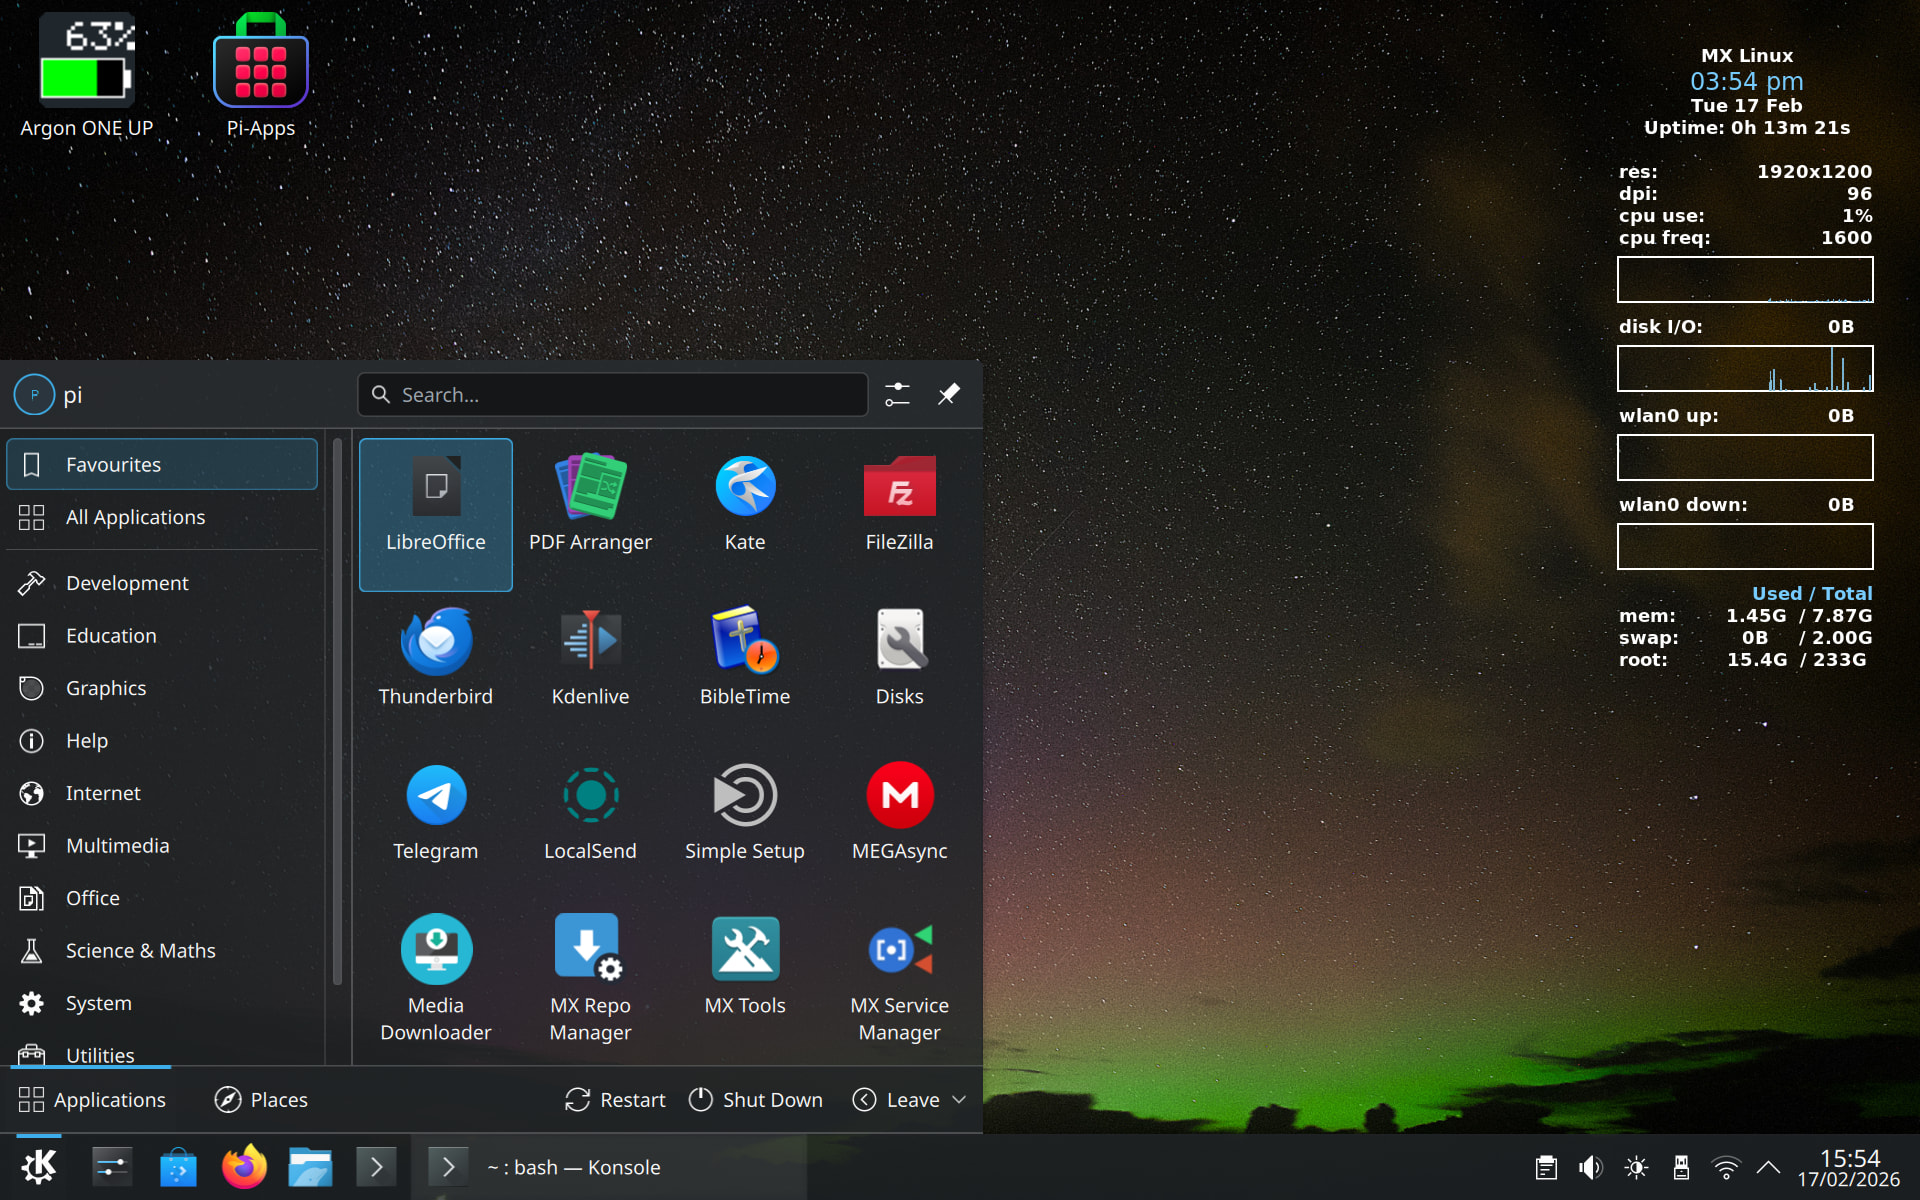
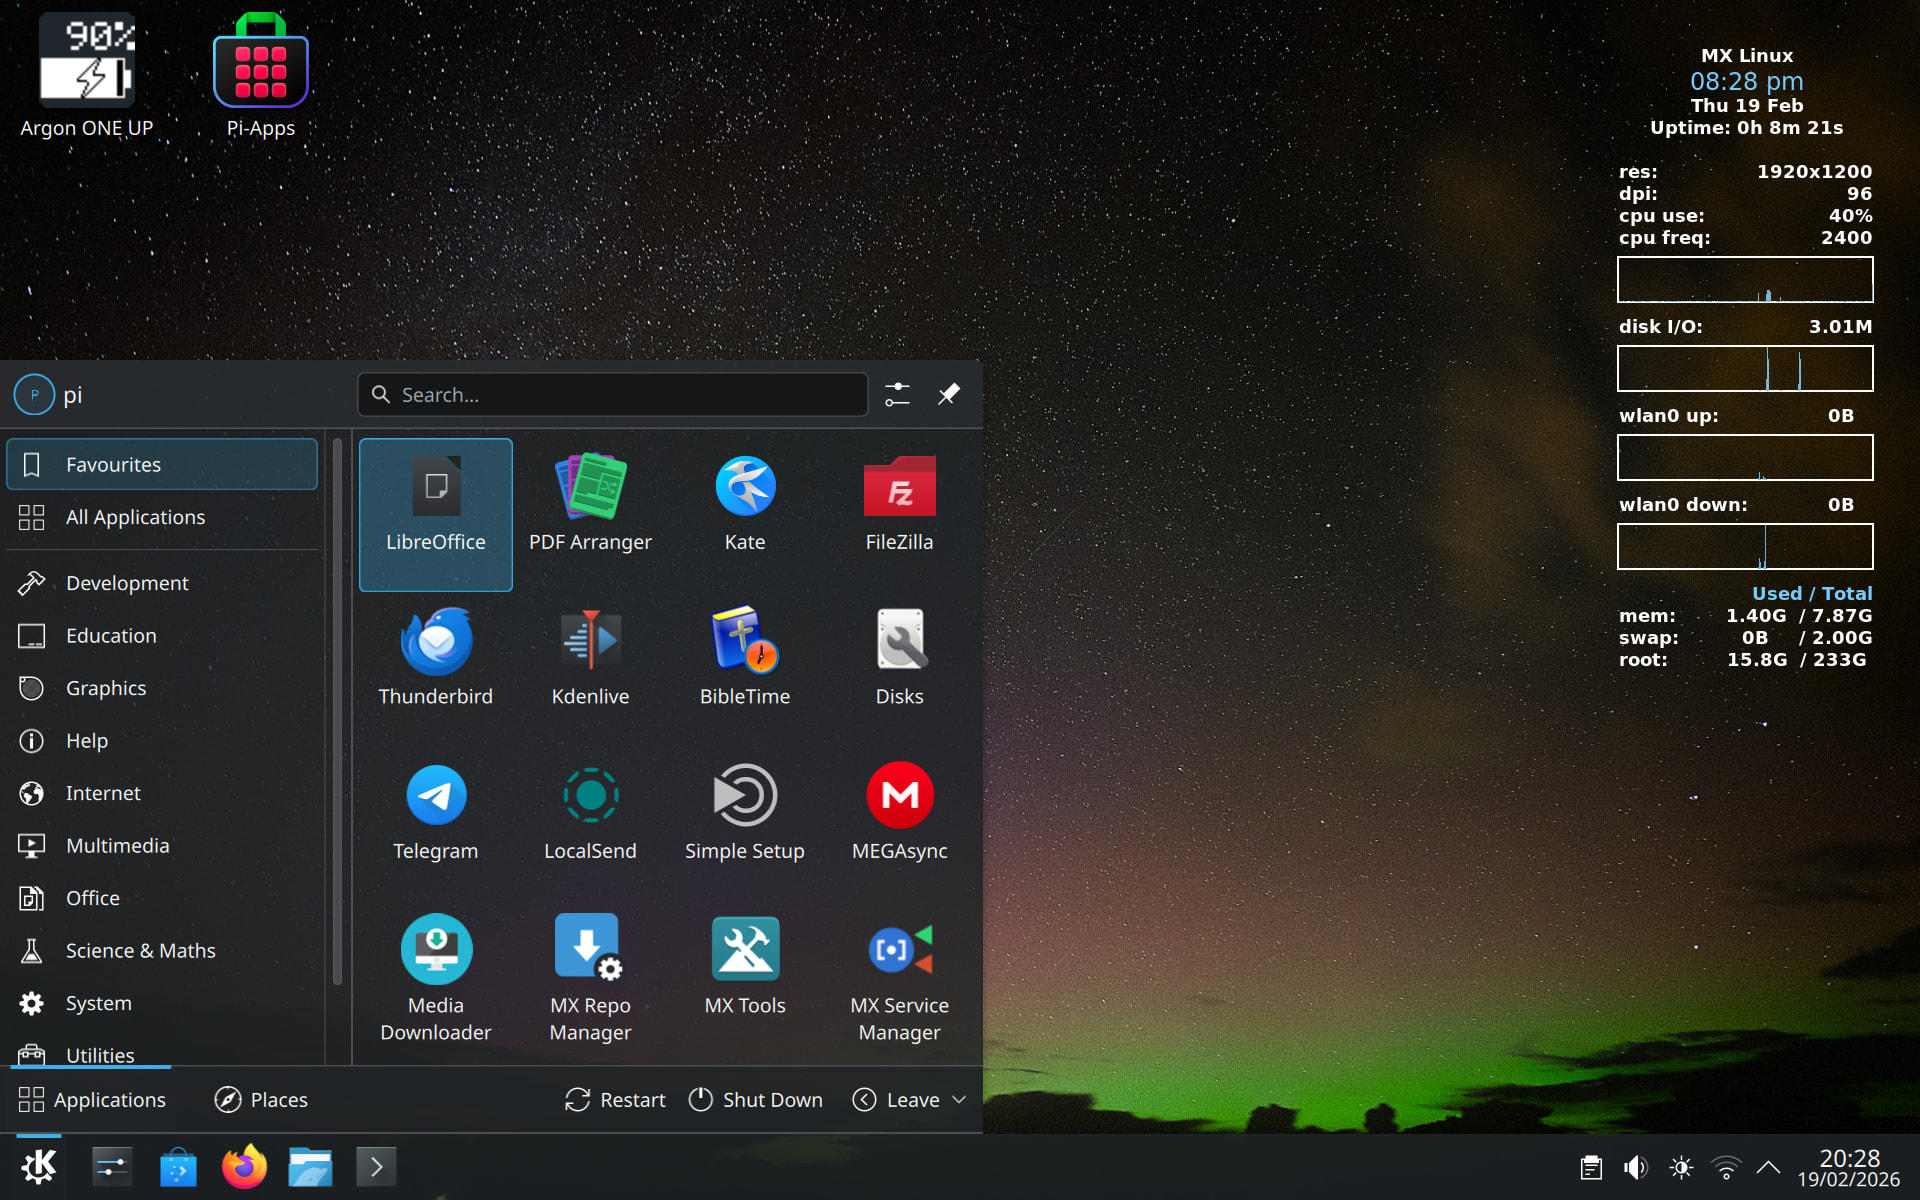
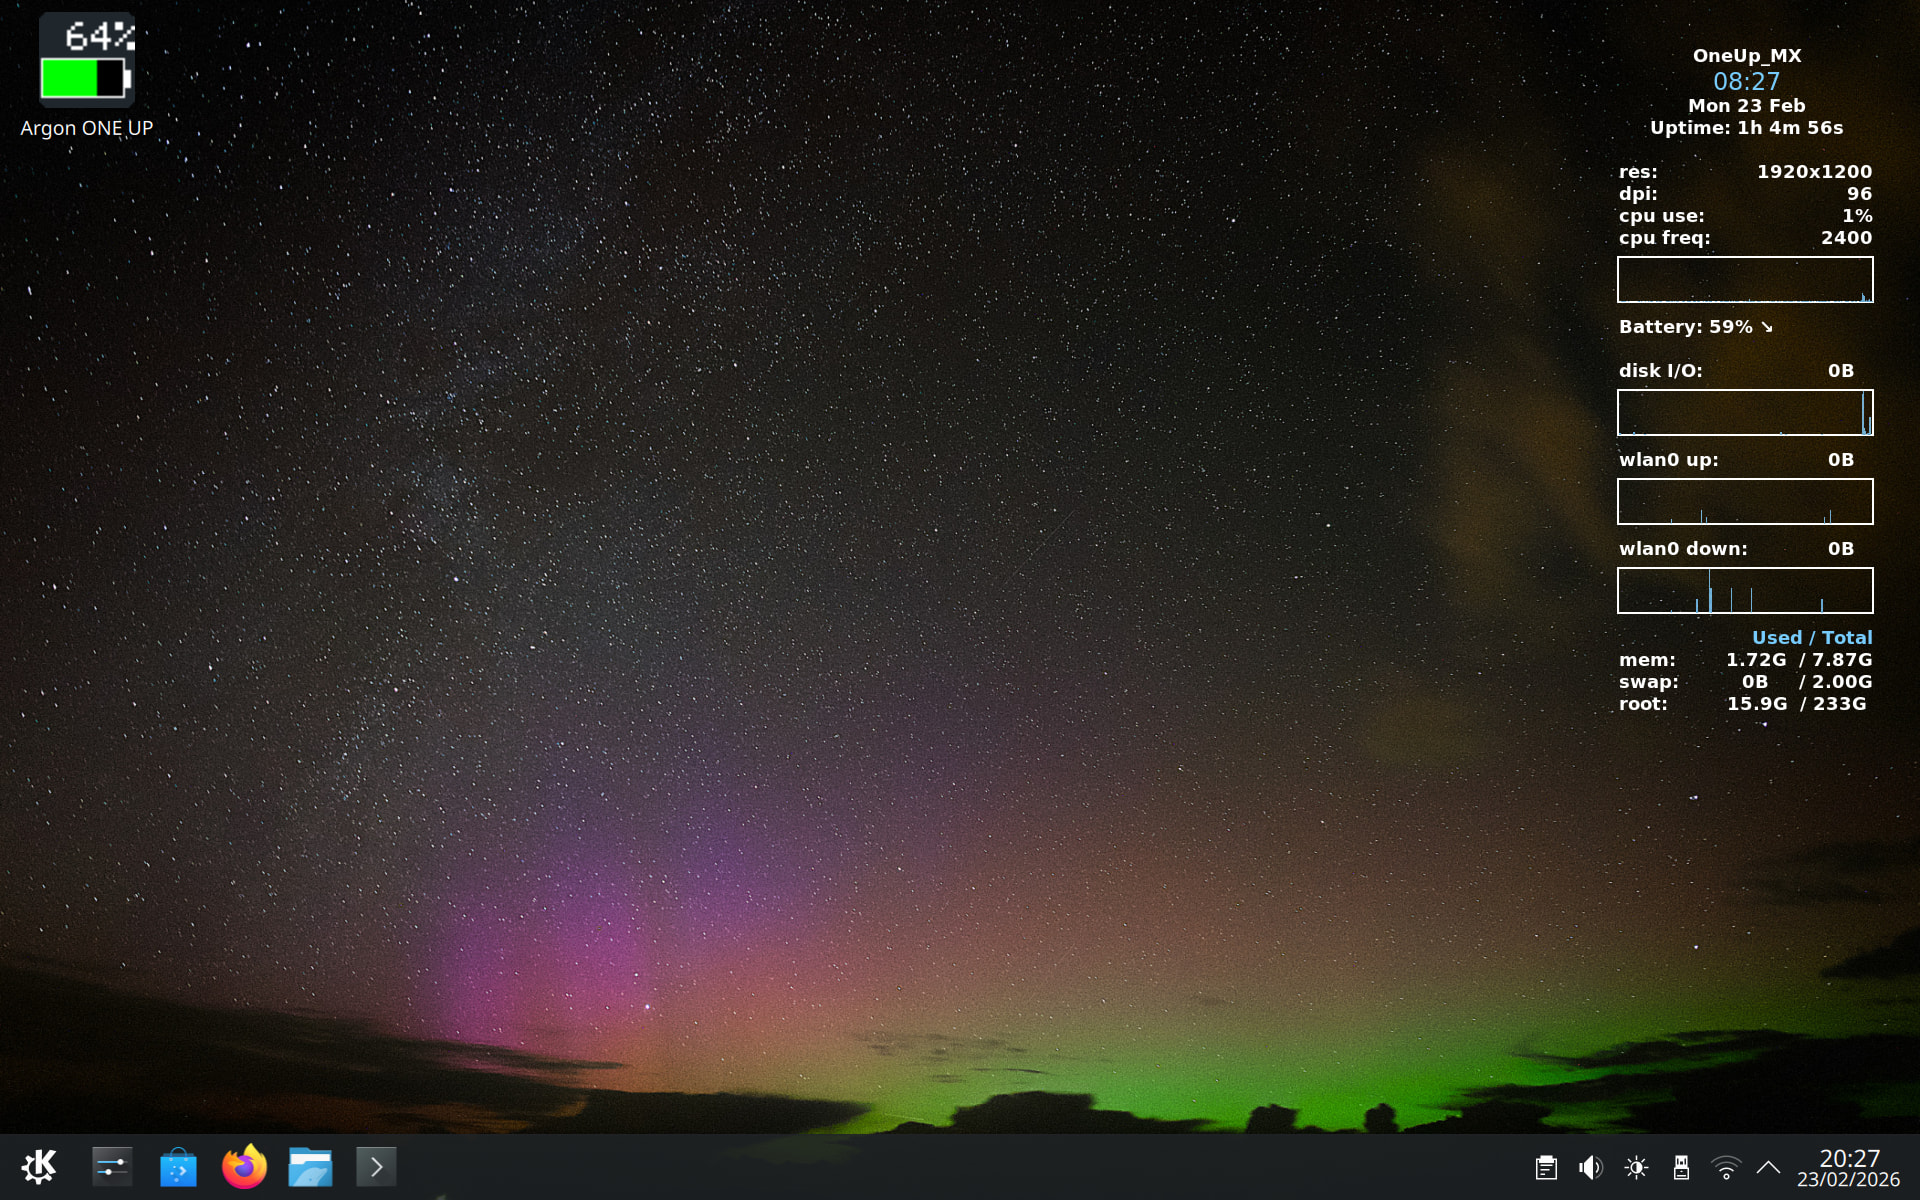
Thanks Dukla2000, this seems to me to be the most elegant solution! However mine looks like this …

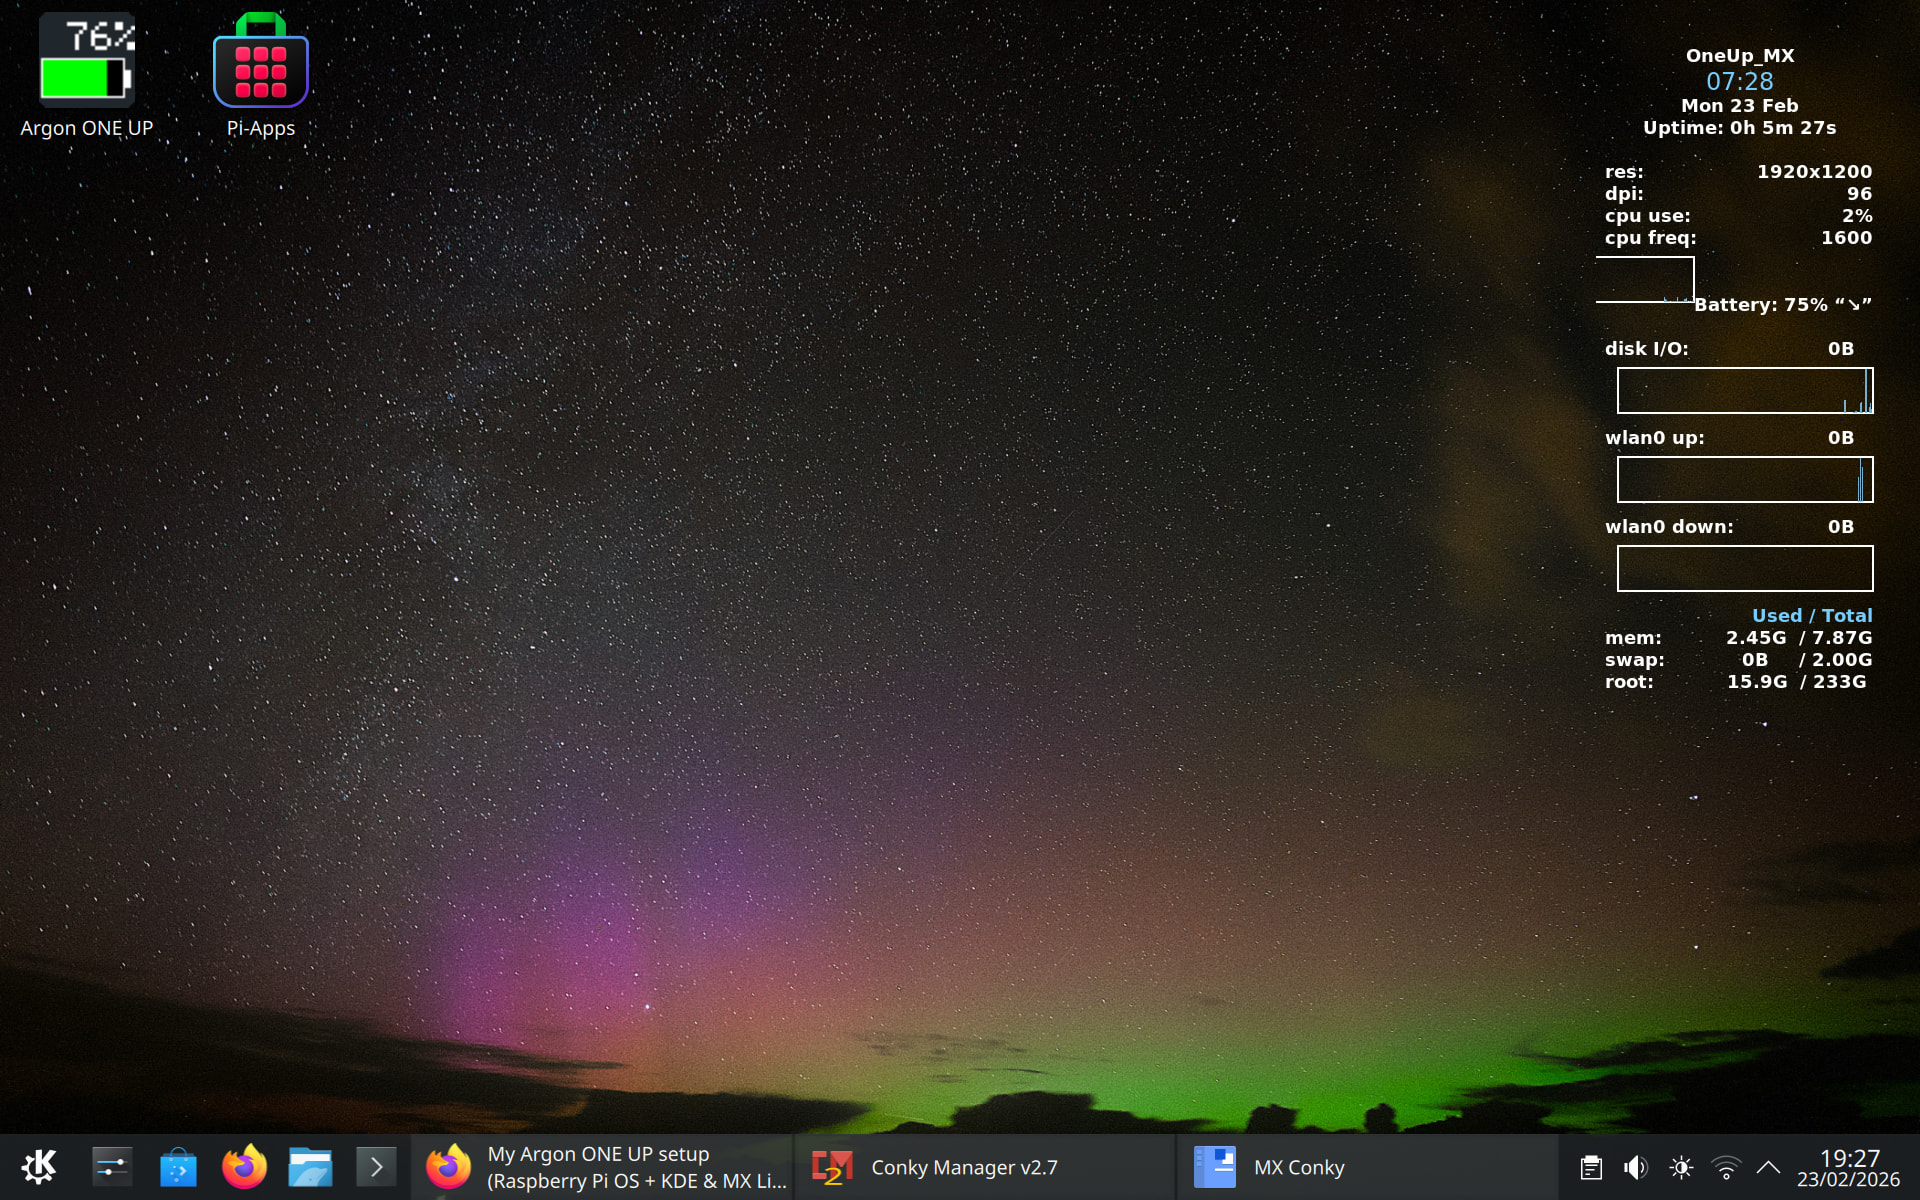
What am I doing wrong? Seems to my untrained Conky-eye that I need a new-line /n between the CPU graph and the battery percentage - any help would be appreciated!


conky.config = {
-- Standard antiX .conkyrc file written by Team antiX.
-- Feel free to use. 
-- anticapitalista@riseup.net

-- Note: delete the line above to disable automatic scaling with DPI
-- on the live system.

-- set to yes if you want Conky to be forked in the background
    background = true,

    short_units = true,

    cpu_avg_samples = 1,
    net_avg_samples = 1,

    out_to_console = false,

-- X font when Xft is disabled, you can pick one with program xfontsel
--font 7x12
--font 6x10
--font 7x13
    font = '8x12',
--font 7x12
--font *mintsmild.se*
--font -*-*-*-*-*-*-34-*-*-*-*-*-*-*
--font -artwiz-snap-normal-r-normal-*-*-100-*-*-p-*-iso8859-1

-- Use Xft?
    use_xft = true,

-- Xft font when Xft is enabled
--xftfont gentium:size=12
--ftfont DejaVu Sans:size=10
    font = 'DejaVu Sans:bold:size=9',
--xftfont DejaVu Sans:size=9

-- Create own window instead of using desktop (required in nautilus, pcmanfm and rox desktops)
    own_window = true,
    own_window_transparent = true,
    own_window_hints = 'undecorated,sticky,skip_taskbar',

-- Text alpha when using Xft
    xftalpha = 1.0,

--on_bottom no

-- mail spool
-- mail_spool $MAIL

-- Update interval in seconds
    update_interval = 1,

-- Use double buffering (reduces flicker, may not work for everyone)
    double_buffer = true,

-- Minimum size of text area
    minimum_width = 5, minimum_height = 5,
    maximum_width = 180,

-- Draw shades?
    draw_shades = false,

-- Draw outlines?
    draw_outline = false,

-- Draw borders around text
    draw_borders = false,

-- Stippled borders?
    stippled_borders = 0,

-- border margins
--border_margin 10

-- border width
    border_width = 1,

-- Default colors and also border colors
    default_color = 'white',
    default_shade_color = 'white',
    default_outline_color = 'white',

    color1 = 'ffffff',
    color2 = 'ffffff',
    color3 = 'ffffff',
    color4 = 'yellow',
    color8 = '77ccff',
    color9 = '5599cc',

-- Text alignment, other possible values are commented
-- alignment top_left
    alignment = 'top_right',
--alignment bottom_left
--alignment bottom_right

-- Gap between borders of screen and text

    gap_x = 30,
    gap_y = 30,

-- Add spaces to keep things from moving about?  This only affects certain objects.
    use_spacer = 'right',

-- Subtract file system buffers from used memory?
    no_buffers = true,

-- if_up_strictness link:  up | link | address
    if_up_strictness = 'address',

-- set to yes if you want all text to be in uppercase
    uppercase = false,

-- boinc (seti) dir
-- seti_dir /opt/seti

--# antiX additives examples. Add below Text##
--#Battery examples##
--#${color}battery: ${color}$acpiacadapter, ${battery_percent BAT1}% 
--#${color}battery:${color} ${battery}
--${color}ACPI Battery: ${color}$battery
--${battery_bar 11,0}
--#Wireless example##
--${color}Wireless:
--${color}essid: ${wireless_essid $template6}
--${color}IP:${color} ${addr $template6}
--${color}speed: ${color} ${wireless_bitrate $template6}
--${color}link strength: ${color} ${wireless_link_bar 7,50 $template6}


    own_window_argb_value = 0,
    own_window_argb_visual = true,
    own_window_colour = '000000',

-- time template
    
    template0 = [[${if_match "pmfix${time %p}" == "pmfix"}${time \1}${else}${time %I:%M}${endif}]],

-- battery templates

    template1 = [[${alignc}${exec /home/pi/bin/battery.sh}\n]],
--    template2 = [[${template1 0}${template1 1}]],

-- network templates

--    template3 = [[${color}\1 \2: $alignr${color3} ${\2speed \1}\n${color2}$alignr${\2speedgraph   \1 30,170 5599cc 5599cc}]],
--    template4 = [[${if_up \1}${template3 \1 up}\n${template3 \1 down}\n${endif}]],
--    template5 = [[${template4 $template4}${template4 $template5}${template4 $template6}${template4 $template7}]],

	template4 = 'eth0', 
	template5 = 'eth1', 
	template6 = 'wlan0', 
	template7 = 'wlan1', 

    
};

-- fluxbox adjustment
return_code = os.execute('pidof -q fluxbox')
if _VERSION == 'Lua 5.1' and math.floor(return_code/256) == 0 or
   _VERSION ~= 'Lua 5.1' and return_code then
   conky.config.own_window_transparent = true
   conky.config.own_window_argb_visual = false
end

-- stuff after 'TEXT' will be formatted on screen

conky.text = [[
${color3}${alignc}OneUp_MX
${color8}$alignc${font DejaVu Sans:size=12}${template0 %H:%M}$font
${color}${alignc}${time %a %d %b}
${color}${alignc}Uptime: $uptime

${color}res:${alignr}${color3}${execi 600 xdpyinfo | awk '/dimensions/ { print $2}' }
${color}dpi:${alignr}${color3}${execi 600 xdpyinfo | awk '/resolution/ { sub(/x[0-9]*/,"",$2); print $2}' }
${color}cpu use:${alignr}${color3}${cpu}${color}%
${color}cpu freq:${color3}${alignr}${freq}
${color}$alignr${cpugraph cpu0 30,170 5599cc 5599cc}\
# battery
${template1}
${color}disk I/O:${alignr}${color3}${diskio}
${color}${alignr}${diskiograph 30,170 5599cc 5599cc}\
# network
${if_up $template4}
${color}$template4 up: $alignr${color3} ${upspeed $template4}
${color}$alignr${upspeedgraph   $template4 30,170 5599cc 5599cc}
${color}$template4 down: $alignr${color3} ${downspeed $template4}
${color2}$alignr${downspeedgraph $template4 30,170  5599cc 5599cc}${endif}${if_up $template5}
${color}$template5 up: $alignr${color3} ${upspeed $template5}
${color}$alignr${upspeedgraph   $template5 30,170 5599cc 5599cc}
${color}$template5 down: $alignr${color3} ${downspeed $template5}
${color2}$alignr${downspeedgraph $template5 30,170  5599cc 5599cc}${endif}${if_up $template6}
${color}$template6 up: $alignr${color3} ${upspeed $template6}
${color2}$alignr${upspeedgraph   $template6 30,170 5599cc 5599cc}
${color}$template6 down: $alignr${color3} ${downspeed $template6}
${color2}$alignr${downspeedgraph $template6 30,170 5599cc 5599cc}${endif}${if_up $template7}
${color}$template7 up: $alignr${color3} ${upspeed $template7}
${color2}$alignr${upspeedgraph   $template7 30,170 5599cc 5599cc}
${color}$template7 down: $alignr${color3} ${downspeed $template7}
${color2}$alignr${downspeedgraph $template7 30,170 5599cc 5599cc}${endif}
${color}${alignr}${color8}Used / Total
${color}mem:${alignr}$mem ${color3} /${color} $memmax
${color}swap:${alignr}$swap ${color3} /${color} $swapmax
${color}root:${alignr}${fs_used /} ${color3} /${color} ${fs_size /}
]]

BTW I don’t grow any spanpek, but I do breed Rhodesian Ridgebacks https://cairn.co.za/rr

Ahh! Got it working …

… thanks a lot! How do I ditch the Argon battery meter on the desktop? Deleted it … but it comes back!

I think you have to type in the following into terminal:

sudo systemctl disable --now argononeupd.service

Then you can delete the argon icon
1 Like

I’m also a KDE-Plasma fan and use Fedora KDE on my main PC. I also have a OneUp with Ar-256 NVME, CM5-Lite and RPI-Trixie pre-installed. I’ve tried you process and have a question. After installing the KDE-Plasma-Desktop did you reboot the system? If yes did you get the KDE signon screen?

What I am seeing is that on reboot the system starts but halts the boot process with the following message:

completed interaction for the boot stage final

and then halts.

Doing a web search resulted in the error pointing to a failure in the cloud-init process and a recommendation of disabling cloud-init by putting an empty file called cloud-init.disabled in the /etc/cloud folder using the touch command. However, this did not solve the problem.

Any ideas on this particular issue?

Note,

  1. I modified the boot order to USB, NVME, SD and Repeat i.e. 0xf164 in the eeprom config.

  2. Also, and this is very curious is that I can make a USB drive using RPI-Imager with RPI-Trixie OS and then install the kde-plasma-desktop at the command line and this boots without any issues.

1 Like

I think the easiest way is to uninstall the script. To do this at the command line type: argon-config

This will bring up the options selection. Select 4 to uninstall. This will remove the script and icons from your system.

1 Like

I also had this issue when I first installed kde (got two lines during the boot process: completed socket interaction for boot stage config; completed socket interaction for boot stage final). What I ended up doing is uninstalling the raspberry pi desktop after I installed kde using tasksel. I used the following commands to remove the raspberry pi desktop:

  1. sudo apt purge lxde* lightdm* openbox* -y

  2. sudo apt purge raspberrypi-ui-mods -y

  3. sudo apt autoremove --purge -y

  4. sudo apt clean

  5. sudo reboot

I am not sure why this worked for me though.

1 Like

Thanks for the reply. I ended up disabling the argon40 service using: sudo systemctl disable --now argononeupd.service and it worked after deleting the script icon from my desktop.

1 Like

Many thanks for the prompt reply. I’ll give this a try and let you know the result.

1 Like

Your guidance worked like a charm. I now have Debian KDE-Plasma up and running. I suspect that there might have been a conflict between the lightdm installed under the original RaspberryPI OS and sddm installed with KDE-Plasma.

But, as originally stated when I prepared a USB drive without removing the packages you have highlighted the USB booted fine and the KDE-Plasma was working OK.

1 Like
Which Raspberry Pi’s do you own?
  • Original Raspberry Pi Model B
  • Raspberry Pi Model A
  • Raspberry Pi 2 Model B
  • Raspberry Pi 3 Model B
  • Raspberry Pi 3 Model B+
  • Raspberry Pi 3 Model A+
  • Raspberry Pi 4
  • Raspberry Pi 400
  • Raspberry Pi 5
  • Raspberry Pi 500
  • Raspberry Pi 500+
  • Argon40 OneUp Laptop
0 voters

I also have one of the first Raspberry PI laptops developed by Elecrow called the CrowPI-L which is based upon the RPI 4B.

2 Likes